I took on the challenge of baking the large Wedding cake and 80+ dessert table for my Brother’s wedding… here’s how it went!
Sounds daunting, but it seemed like a fun idea at the time; little did I know, there would be many issues that lay ahead and some things did not go according to plan.
The request began with:
- Large wedding cake to feed everyone with plenty to spare and take home, 3 tiers and two types of flavours (Strawberry shortcake with fresh strawberries and lemon poppyseed with lemon curd), fondant coating with quilted bottom layer and finished with flowers to match the colour theme
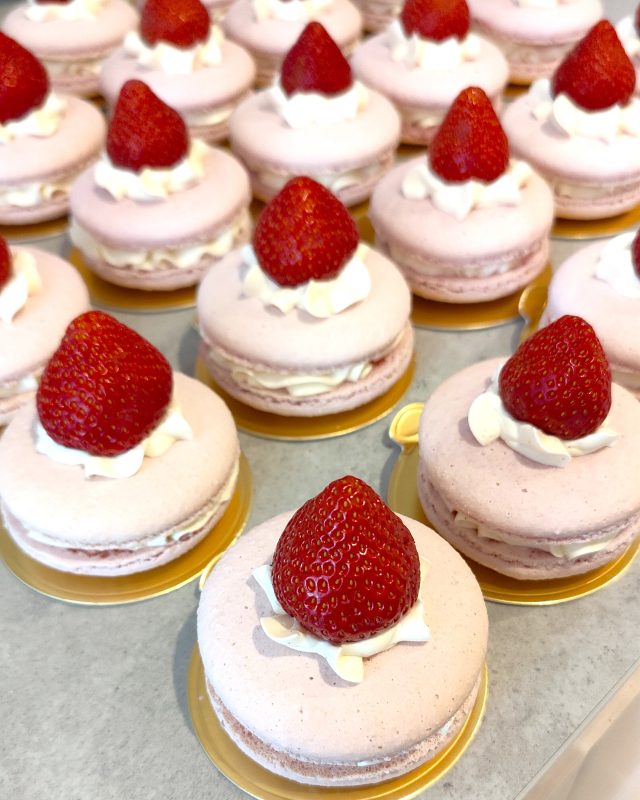
- Dessert table of 80 pieces: 4 different types, must be cute, match the theme colours, not too sweet and taste great
Task One: Planning
Planning is just as important as the execution.
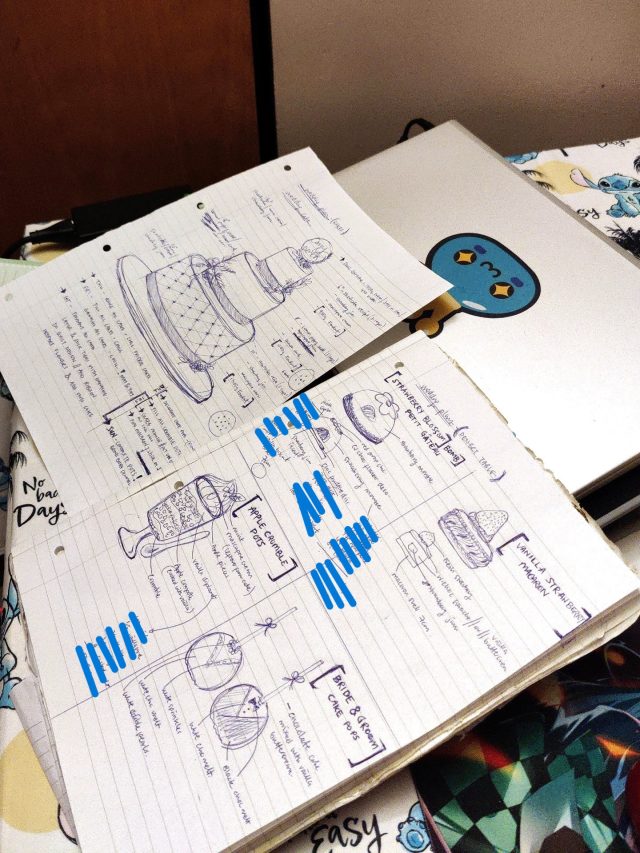
As I work solely from my home kitchen, quality time was needed to devise a plan that would work around everything that was going on i.e around my orders, within my kitchen constraints and how much fridge/freezer storage space available – these are all very important elements to factor in. Firstly, think about what planning style works for you: check lists, tables, graphs, drawings, written documents, pictures, moodboards, whichever style works for you, just ensure it is clear to read, concise and easy to follow.
For me, I always start off with a very hands-on approach [shown in the picture below] mapping out what I envision with imagery and then once all the details are confirmed with the couple, I type it all up with moodboards and photos, send it back to the couple to confirm last details and then done! Possibly, because of my graphic design background I find drawing my ideas out helps me process information better; but you do what works for you.
The part I struggled most was figuring out where to store all the finished items; this proved especially difficult as I have limited fridge and freezer space. Knowing this, I planned the desserts around what was possible in my restricted space: which desserts can be stored at ambient temperatures, which desserts can stay frozen, which desserts require refridgeration and which desserts need to be assembled last minute, whilst also remembering that the finished large cake also requires a lot of fridge space. Doing this, ensured that I fully utilised every storage space as possible.
When you have that in place, add your recipes, buy any non-perishable ingredients or equipment so you can be ahead of the game! Creating daily to-do lists steadily guided me through each process, enabling me to be one step closer to my goal.
Task Two: Preparation
Any components that can be prepped ahead of time, do it!
From your meticulous plan, you should be able to decide which elements need to made last minute and other parts can be made ahead of time. For example, the wedding cake filling contained jam, so I cooked the jam two weeks in advance and safely stored them in sterilised jars without refridgeration – this saves fridge space too!


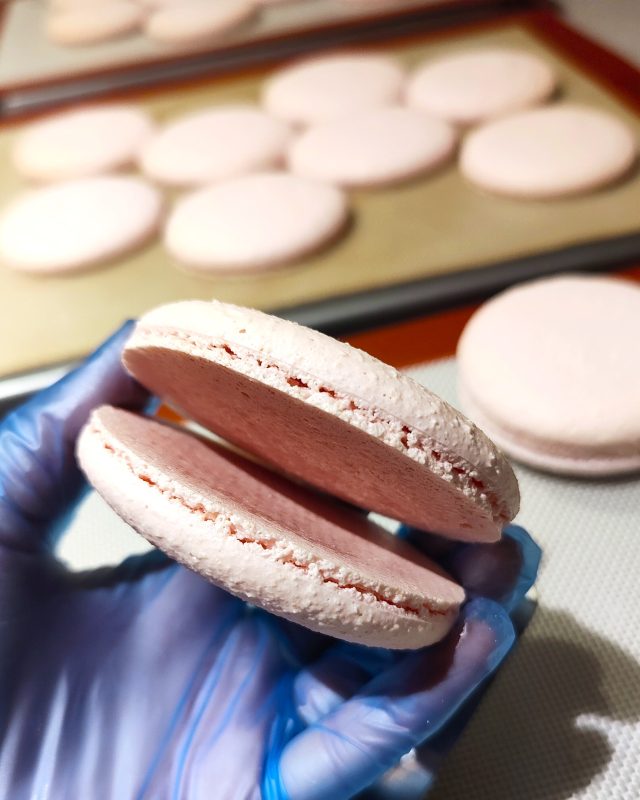
As jam flavour intensifies over time, I was able to make this ahead of time, as well as, prepare the macaron shells as these can be stored in an air-tight container and frozen up to a month. If you decide to fill these with buttercream they can be frozen together, however, as the wedding macaron dessert contains a filling center (which cannot be frozen) I was not able to do this. Prepping anything in advance is always a good idea, not only does it allow you time to fix anything if it goes wrong, but also, offers you more time closer to assembling – win win situation!
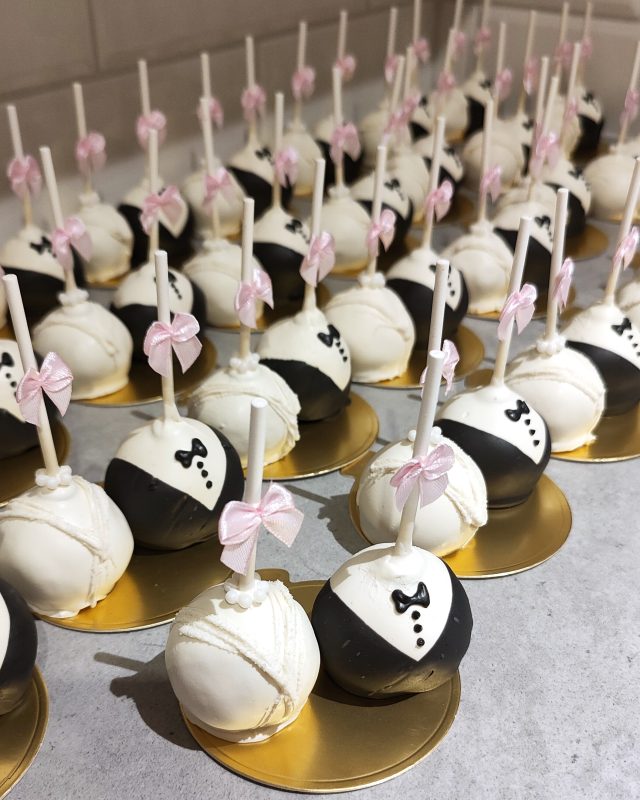
Any components that require freshness (such as fruits, creams and dairy items) should be created in the last two, no more than three days before the event, this ensures the flavour is still fresh when consuming on the actual wedding day. Also, be sure to ask the wedding manager if there is refridgeration available at the venue, so that there is place to store desserts and not left out the whole day if the guests are eating the desserts in the evening (in my Brother’s wedding, the dessert table was prepared for the evening). Some of the desserts required last-minute assembling, so I did this early morning before attaching the flowers onto the wedding cake. Whereas some of the desserts, were able to keep out such as the cake pop because the layer of chocolate acts as a seal.


Task Three: Completion
Time to bring all your hardwork together! Elements assemble!
Ok, there’s only THREE DAYS to go before the actually wedding day – what do you do?! First, don’t freak out! You haven’t come this far just to crumble now! 💪🏻
The last few days should be used for baking, layering and assembling the wedding cake; the very last element to add are the flowers, as you do not want them to wilt in the fridge before the wedding day. For my brother’s wedding cake, I used mascarpone fresh cream inbetween the layers, this makes it structurally stronger than using fresh cream alone. However, doing so, meant that it must be chilled at all times, even more so, with the British summer heat looming. Luckily, my brother wanted fondant coating due to his request of the quilted design. Fondant acts like a barrier, which then further protects the cake from the summer heat and allows the fillings to stay cooler for longer. To get very crisp angles, I would fridge each tier and
Stacking cakes takes time and precision! Do not rush this part, it may seem very simple but if your cake is not level, there is potential risk of it toppling over during your delivery. Treat your flowers as if you would in a florist and assemble them early morning before your delivery. This blog covers more technical details, to read more about the venue and BTS struggles, click the cake photos below!


Task Four: Delivery
You’re not done yet until the goods arrive in one piece!
Delivery is one of THE MOST nervewracking parts of the entire process – ensuring nothing gets damaged upon travel, no tiers fall over or even squashed are all things to plan for. Make sure you have boxes with extentions if it’s a tall cake and a non-slip matt underneath. The cake shop lady actually gave me me the wrong size box and also lid (so these did not fit together), so I simply used clingfilm to wrap the sides and top to ensure the flowers and cake do not get damaged.
As for the desserts, I placed paper kitchen towels on the base to stop the cake cards from shifting around on the smooth surfaces of the air-tight food-safe containers. All in all, nothing got damaged upon delivery, which was amazing!


Thank you for following me on this crazy rollercoaster journey, hope these tips helped! Wishing you guys all the best on your baking adventures – wedding season is upon us! 💍💒